
- Requirements
- 1 Install and Activate the Plugin
- 2 Create Your Parent Form and Child Form
- 3 Add Repeating Fields to Your Child Form
- 4 Add the Repeater / Nested Form Field to Your Parent Form
- 5 Connect Your Child Form, Summary Columns & Entry Labels
- 6 Customize the Popup Modal Color
- 7 Set Entry Limits and Repeater Pricing (Optional)
- 8 Preview and Test on the Frontend
- Mobile-Friendly Card Layout
- Managing & Exporting Entries
- Frequently Asked Questions
Nested Forms and Repeater Fields for Gravity Forms lets you embed clean, repeatable child forms inside any Gravity Form—complete with a customizable popup modal, live summary table, mobile-friendly stacked cards, entry limits, and automatic per-row pricing.
Follow this step-by-step guide to install the plugin, connect your Parent and Child forms, customize the popup modal, and optionally turn on per-row pricing.
Requirements #
Before getting started, make sure your WordPress site meets the following requirements:
- WordPress: 6.5 or higher (tested up to 7.1)
- Gravity Forms: 2.5 or higher (installed and active)
- PHP: 7.4 or higher
1 Install and Activate the Plugin #
- Download the plugin
.zipfile from your WP Prism account or purchase confirmation email. - In your WordPress dashboard, go to Plugins → Add New → Upload Plugin.
- Choose the
.zipfile, click Install Now, and then click Activate Plugin. - Enter your license key when prompted to enable automatic updates and support.
2 Create Your Parent Form and Child Form #
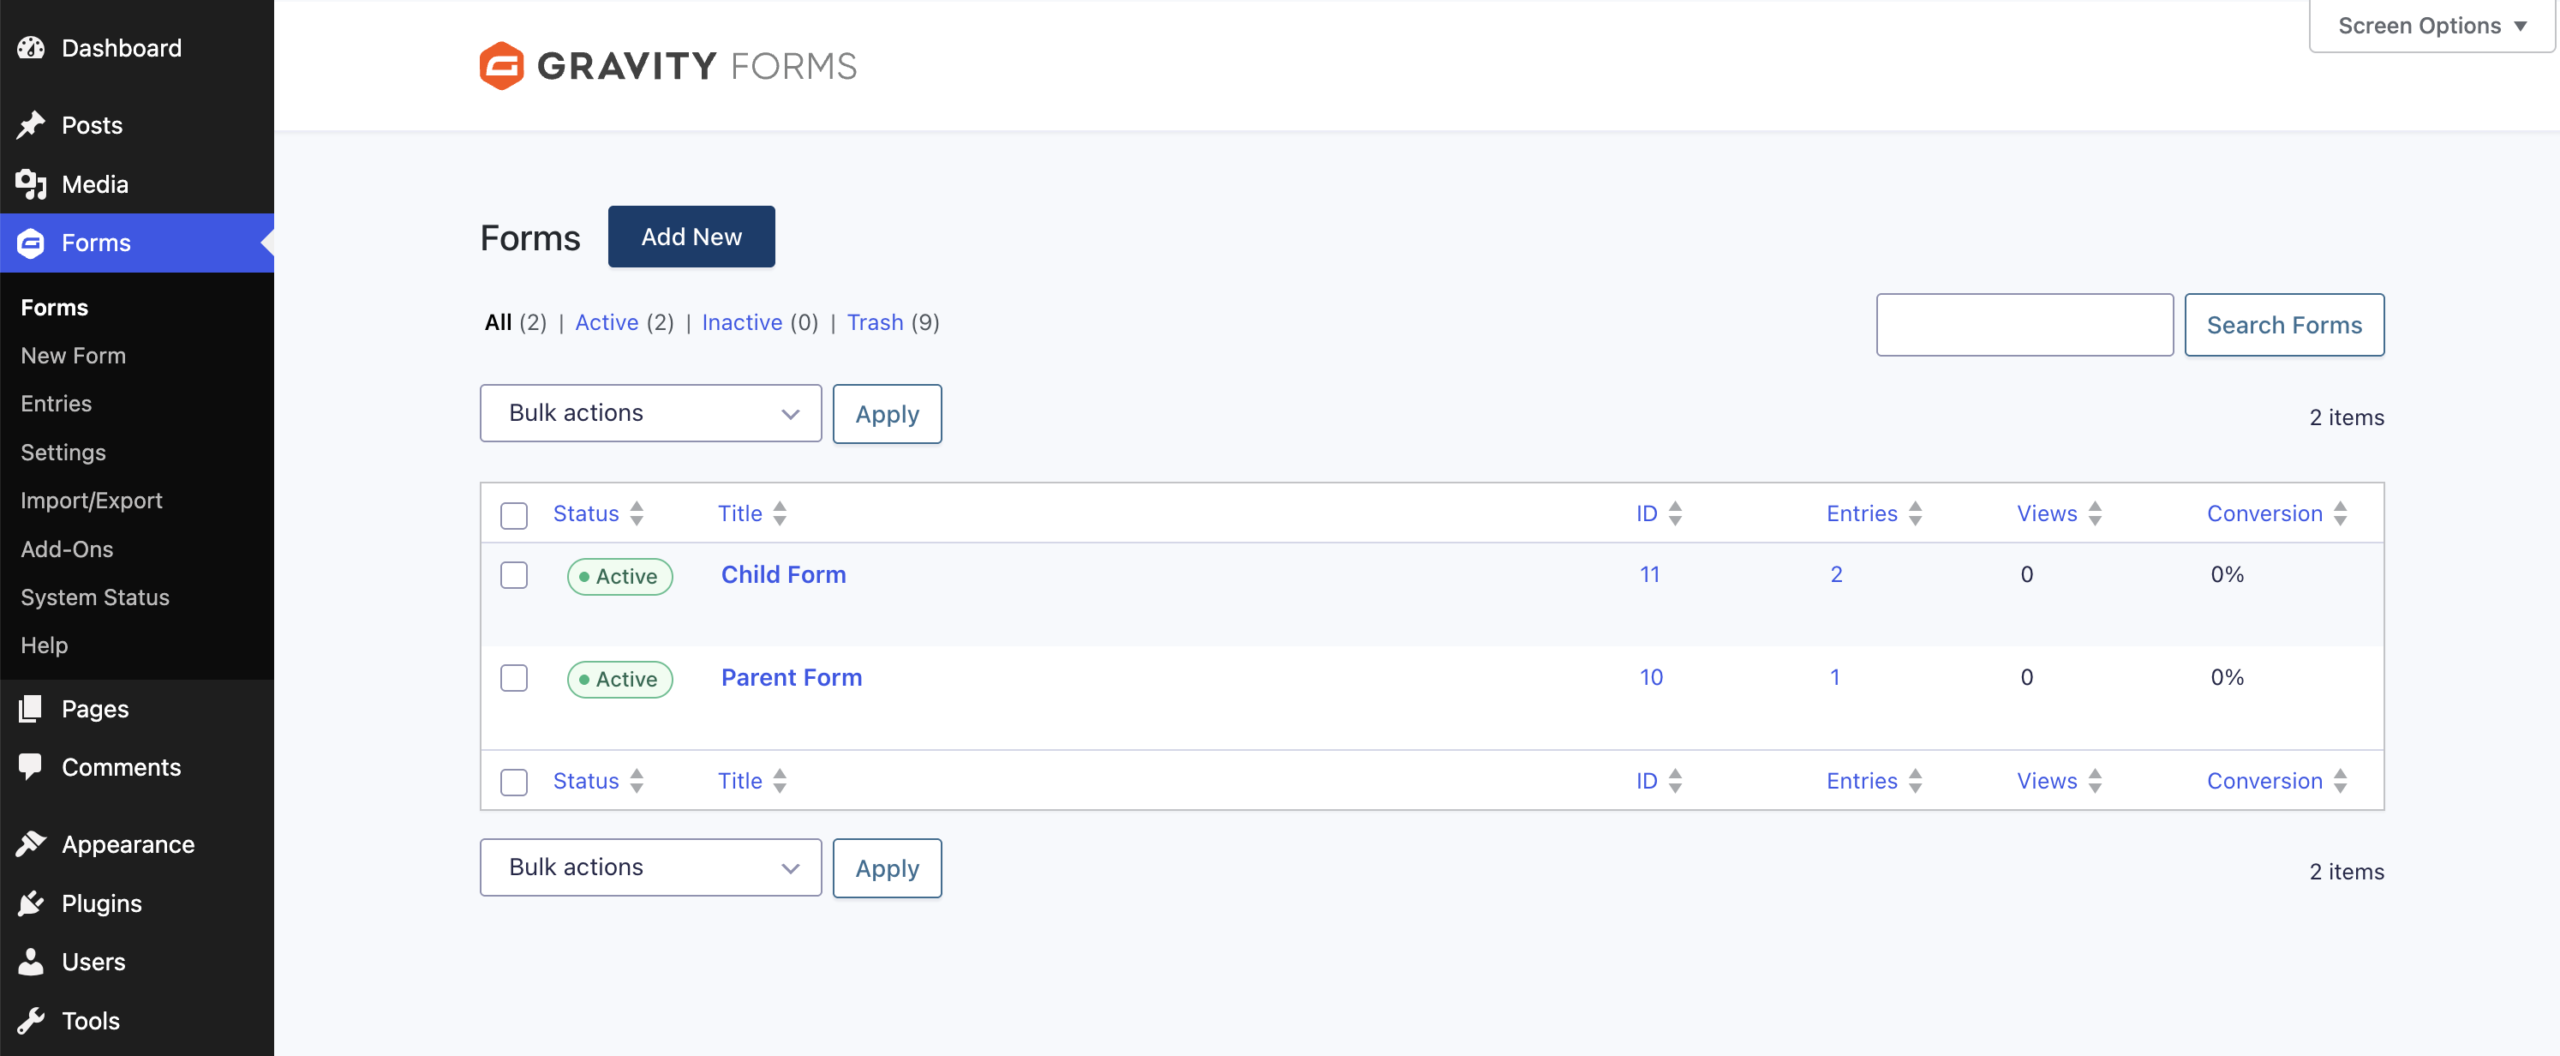
Nested Forms works by connecting two regular Gravity Forms together:
- Child Form: Contains the repeating fields visitors fill out for each item (for example, each guest, attendee, pass holder, or order item).
- Parent Form: Your main form that collects primary details (such as group details, contact info, or payment) and displays the repeating rows from your Child Form.
In WordPress, go to Forms → Add New and create both forms (for example, Parent Form and Child Form).
3 Add Repeating Fields to Your Child Form #
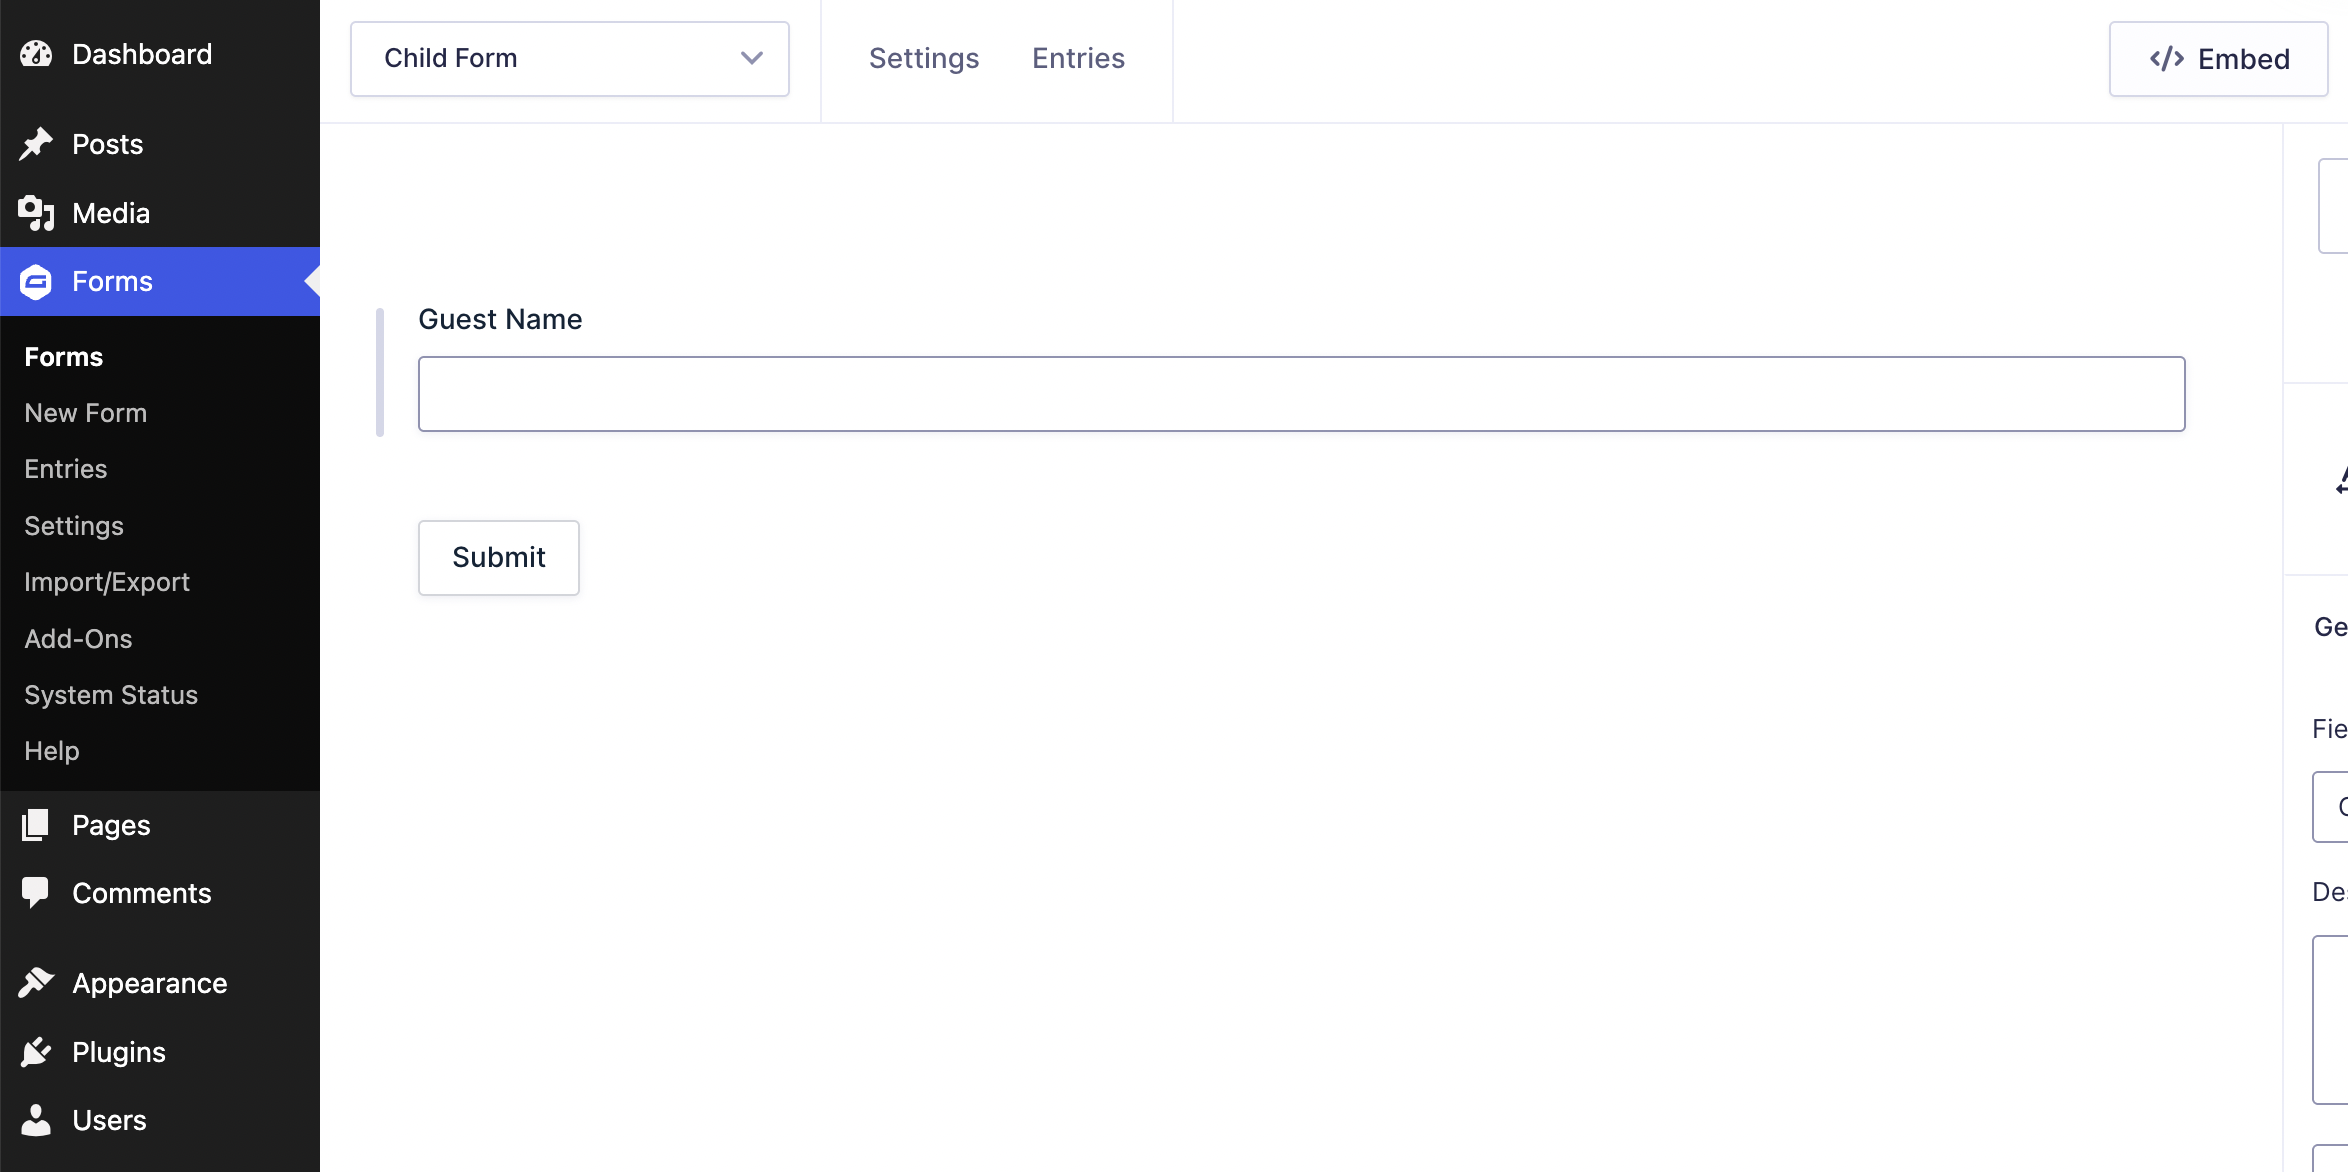
- Open your Child Form in the Gravity Forms editor.
- Add the fields you want to collect for each repeating row—such as Guest Name, Email, Dropdowns, Checkboxes, or File Uploads.
- Click Save Form.
4 Add the Repeater / Nested Form Field to Your Parent Form #
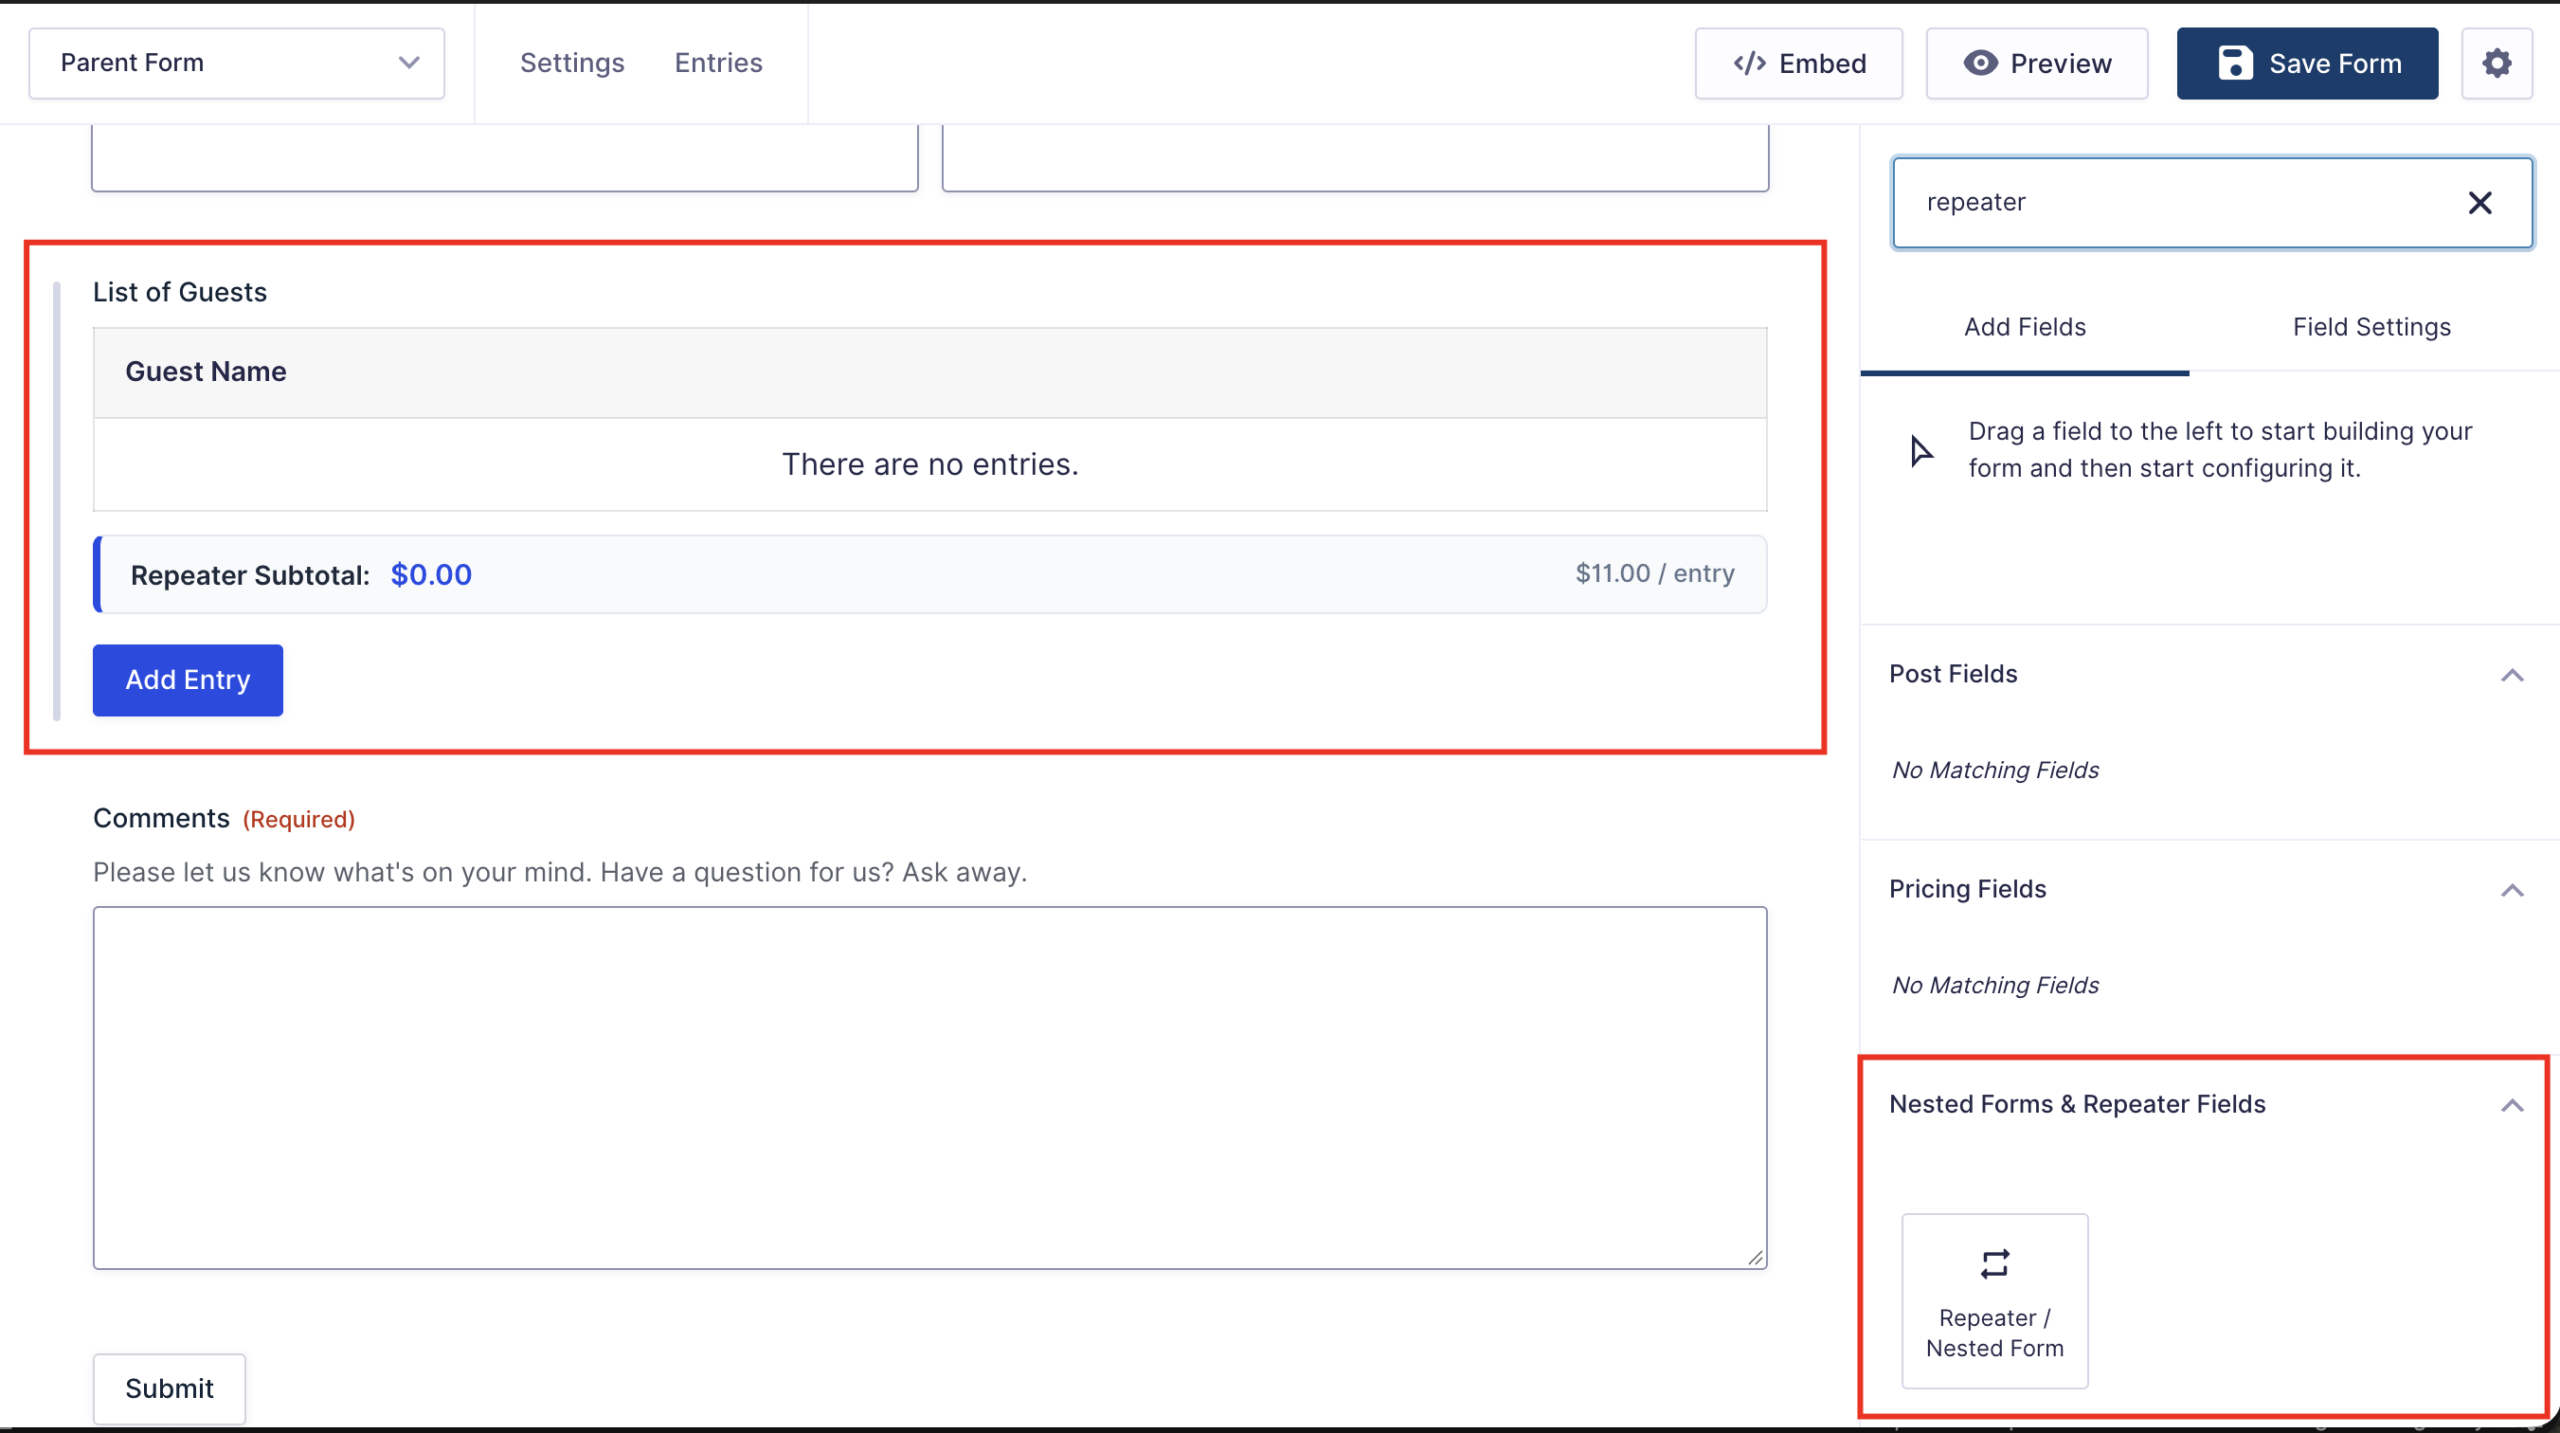
- Open your Parent Form in the Gravity Forms editor.
- In the right-hand Add Fields sidebar, open Nested Forms & Repeater Fields (or type
repeaterin the search bar). - Drag and drop the Repeater / Nested Form field onto your form where you want the summary table and Add button to appear.
5 Connect Your Child Form, Summary Columns & Entry Labels #
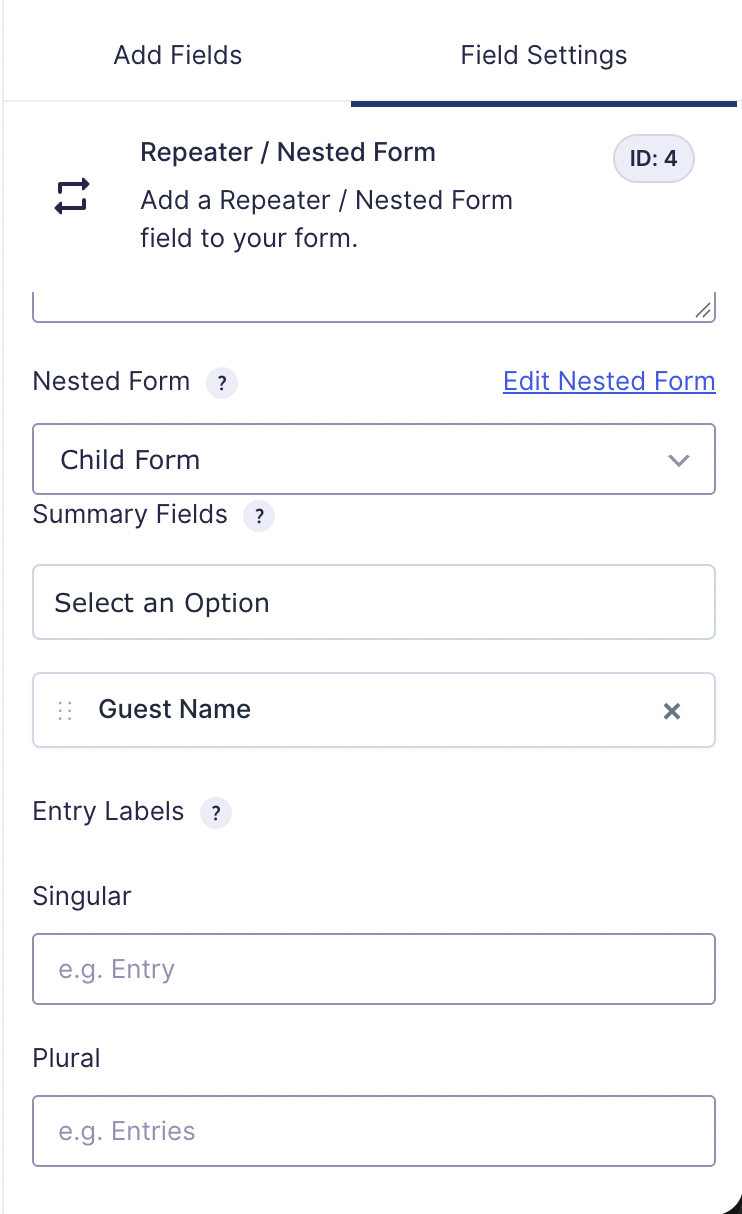
Click the Repeater / Nested Form field on your Parent Form to open its Field Settings panel:
- Field Label: Give the section a clear heading (for example,
List of GuestsorFestival Pass Holders). - Nested Form: Select your Child Form from the dropdown. Click Edit Nested Form anytime if you need to quickly jump back and edit its fields.
- Summary Fields: Pick which fields from your Child Form should display as columns in the live summary table. Drag and drop selected items to reorder columns.
- Entry Labels (Optional): Set custom Singular and Plural names (such as
Guest/GuestsorPass/Passes) to automatically update button text and messages.
6 Customize the Popup Modal Color #
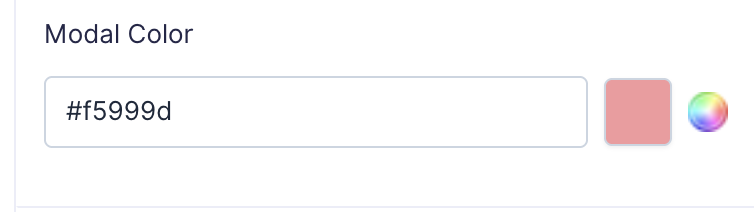
Find the Modal Color setting to match the popup header and submit button to your site’s brand colors. You can type a hex code directly (such as #f5999d) or use the visual color wheel.
7 Set Entry Limits and Repeater Pricing (Optional) #
Scroll down in Field Settings to set entry limits or turn on automatic per-row pricing:
Entry Limits #
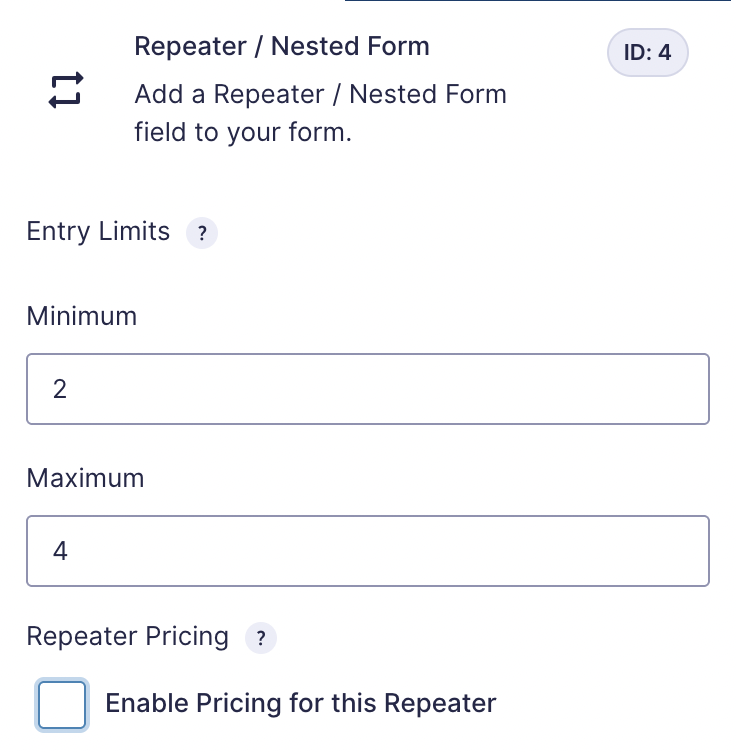
- Minimum: Require visitors to add at least a set number of entries before submitting the Parent Form (for example,
2). - Maximum: Cap how many rows a visitor can add (for example,
4). Once reached, the Add button automatically disables.
Repeater Pricing #
Check Enable Pricing for this Repeater if you want to charge a fixed amount for every row added (such as per guest, ticket, or team member):
- Enter your price per entry.
- A live Repeater Subtotal box appears directly below the summary table and updates automatically whenever rows are added or removed.
- If your Parent Form uses a Gravity Forms Total field or payment gateway (such as Stripe or PayPal), the repeater subtotal is automatically included in the final payment total.
Click Save Form once your settings are complete.
8 Preview and Test on the Frontend #
Embed your Parent Form on any WordPress page (or click Preview in the form editor) to test how visitors interact with it.
Adding Entries via Popup Modal #
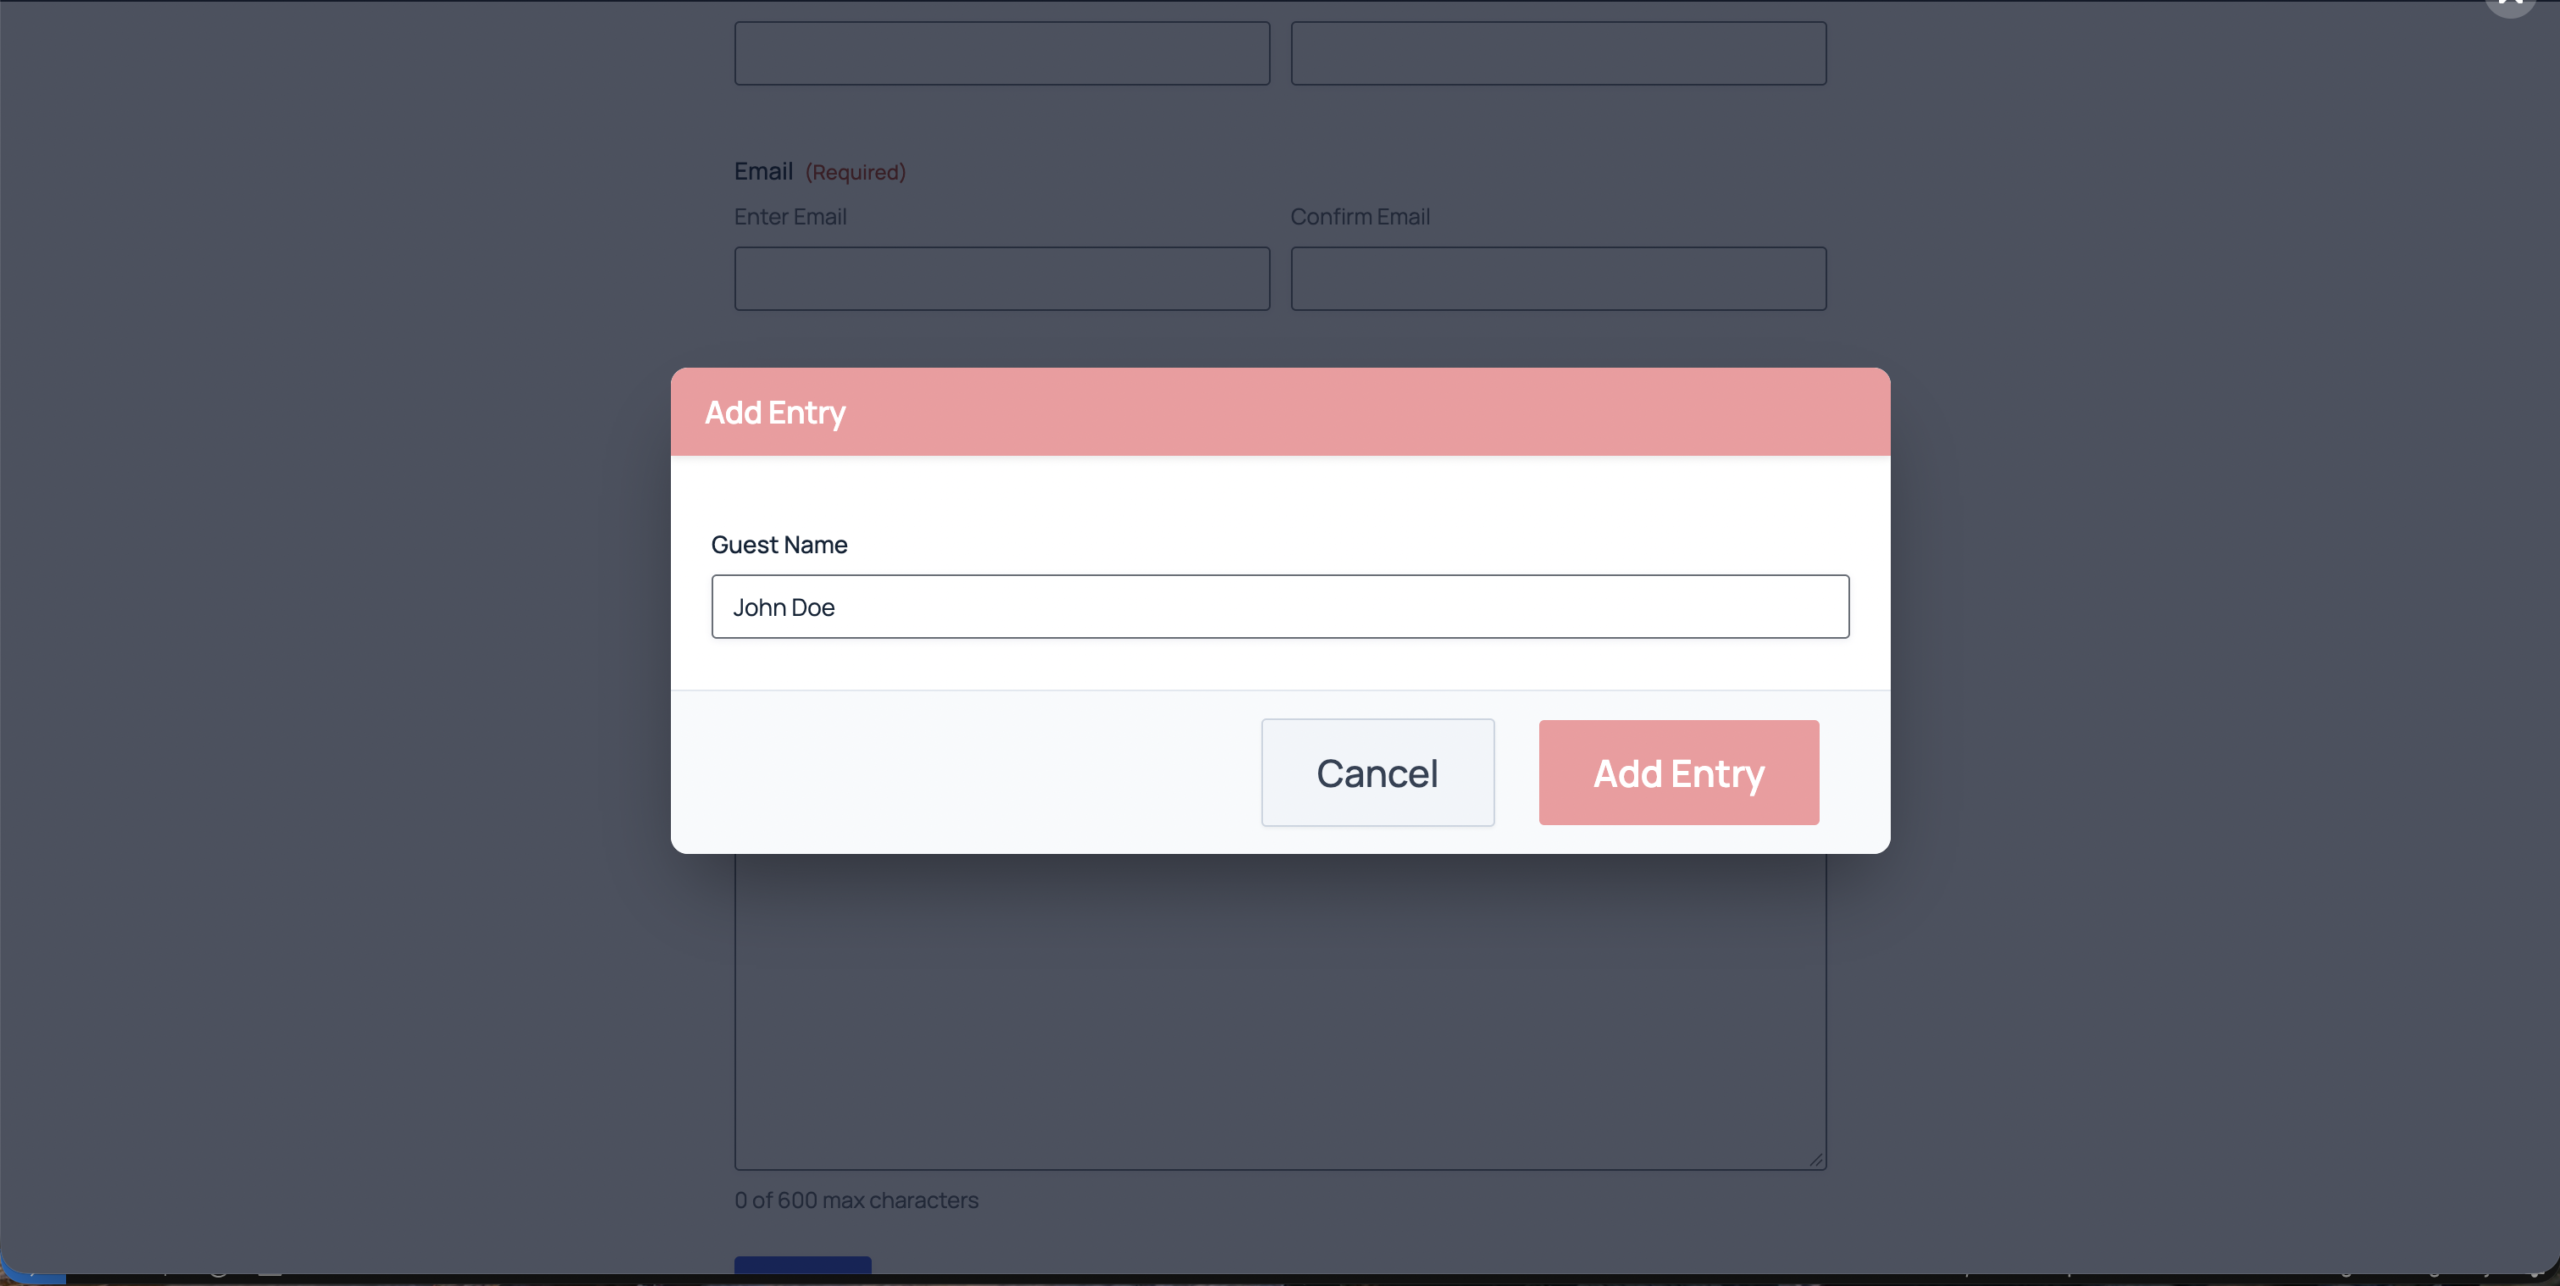
When visitors click Add Entry (or your custom label), the Child Form opens in a clean popup modal styled with your selected Modal Color:
Reviewing, Editing & Deleting Rows #
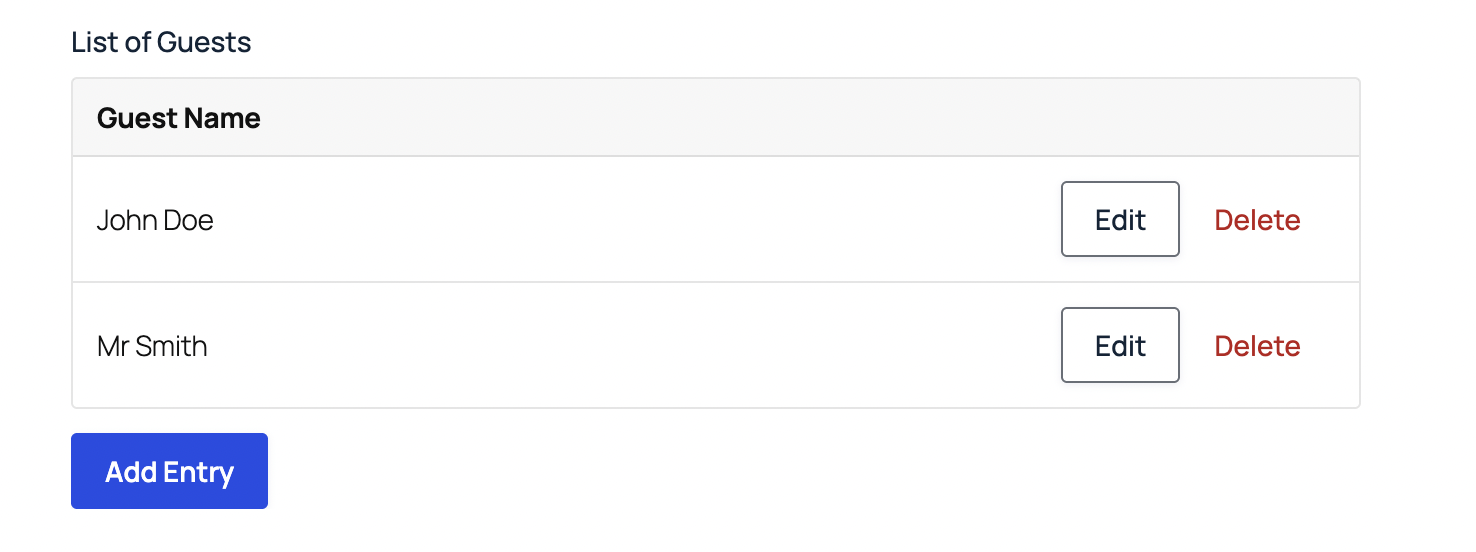
Each saved entry appears immediately in the summary table on your Parent Form. Visitors can click Edit to update any row, Delete to remove it, or Add Entry to add more rows before submitting the main form:
Mobile-Friendly Card Layout #
No extra configuration is required for mobile users. On phones and small tablets, the summary table automatically converts into stacked cards so field labels, names, emails, and longer text remain easy to read with zero overlapping or horizontal scrolling.
Managing & Exporting Entries #
- View Linked Entries: Open any Parent Form submission under Forms → Entries to view all associated Child Form entries together.
- CSV Spreadsheet Export: Go to Forms → Import/Export → Export Entries, select your Parent Form, and check the Child Form fields you want included to export everything together in one CSV file.
- Smart Notification & Payment Timing: Child notifications and feeds wait until the Parent Form is submitted (or payment succeeds with Stripe or PayPal), preventing half-finished alerts.
- Automatic Draft Cleanup: Unfinished rows left behind by visitors who leave without submitting the Parent Form are automatically cleaned up in the background.
Frequently Asked Questions #
Why doesn’t my Child Form appear in the Nested Form dropdown? #
Make sure the Child Form is active (not in Trash) and does not already contain a Repeater / Nested Form field of its own.
Can I use both Normal Repeaters and Pricing Repeaters on the same site? #
Yes. Repeater Pricing is configured per field, so you can enable per-row pricing on registration or order forms while using standard repeaters on other forms.
Will uninstalling the plugin delete my saved Gravity Forms entries? #
No. All Parent and Child entries remain safely stored inside Gravity Forms even if you deactivate or uninstall the plugin.


Leave a Reply