Table of Contents
This guide will walk you through the process of connecting your Gravity Forms to Microsoft Excel Online using our cloud addon.
Video Tutorial (Complete End-to-End Setup) #
For a complete, end-to-end visual walkthrough, check out our full setup tutorial on YouTube:
Step 1: Configure Azure API Credentials #
Before you can sync data, you must connect the plugin to your Microsoft account via the Azure portal.
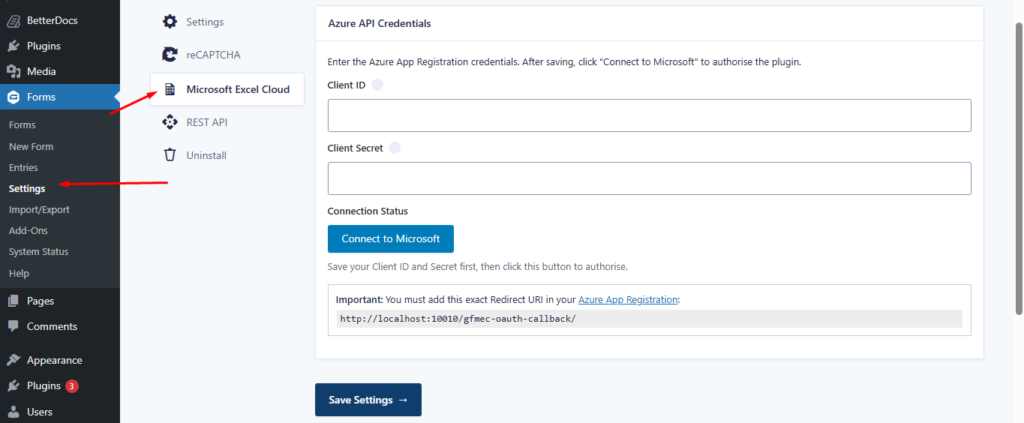
- Navigate to Forms → Settings → Microsoft Excel Cloud.
- Enter your Client ID and Client Secret obtained from your Azure App Registration.
- Copy the Redirect URI provided in the settings and ensure it is added to your Azure App’s allowed redirect list.
- Click Save Settings, then click the Connect to Microsoft button to authorize.
Step 2: Accessing Form Feed Settings #
Once authorized, you can enable the Excel sync for individual forms.
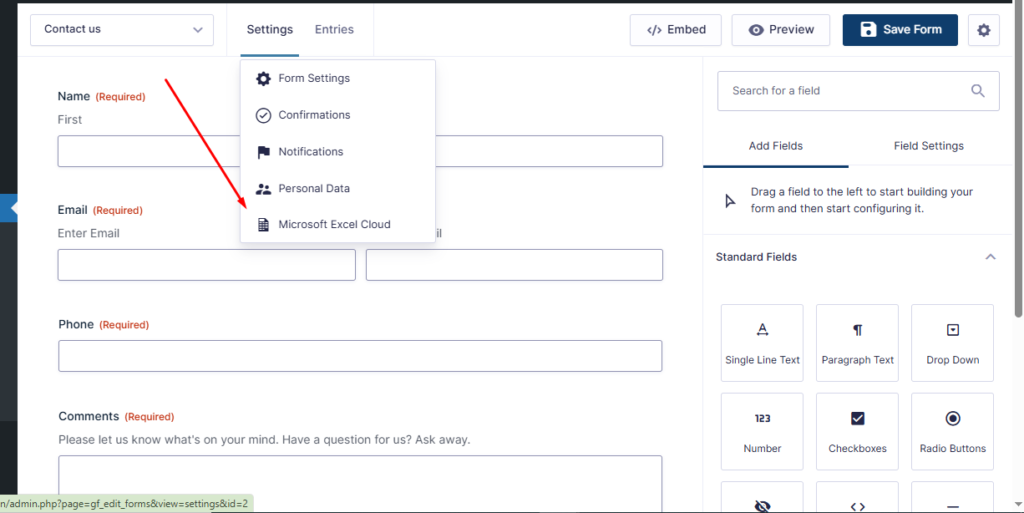
- Edit the form you wish to sync.
- Hover over Settings and select Microsoft Excel Cloud from the dropdown menu.
Step 3: Finding your Excel Document ID #

To link a specific spreadsheet, you need its unique Document ID.
- Open your Excel file in Excel Online (OneDrive or SharePoint).
- Look at the URL in your browser.
- Locate the
docId=parameter and copy the string of characters following it (up to the next&symbol).
Step 4: Configuring the Feed & Field Mapping #
Create a “Feed” to tell the plugin which data goes where.
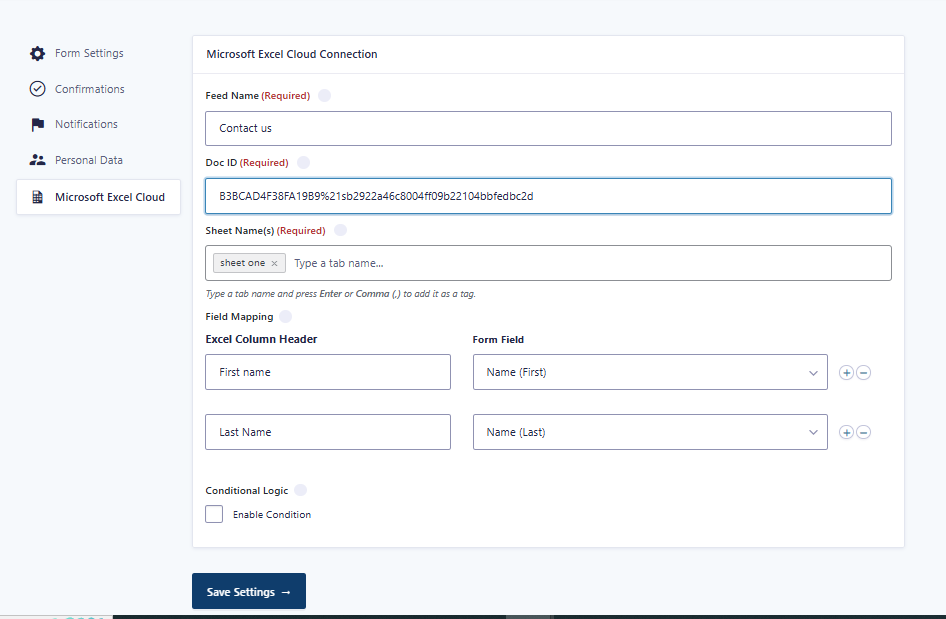
- Create a new feed (e.g., “Contact us”).
- Paste the Doc ID you copied in the previous step.
- Enter the exact Sheet Name (tab name) where the data should be inserted.
- Under Field Mapping, type the names of your Excel Column Headers and select the corresponding Gravity Form field from the dropdown.
Step 5: Verifying the Sync #
Test your form by submitting an entry.
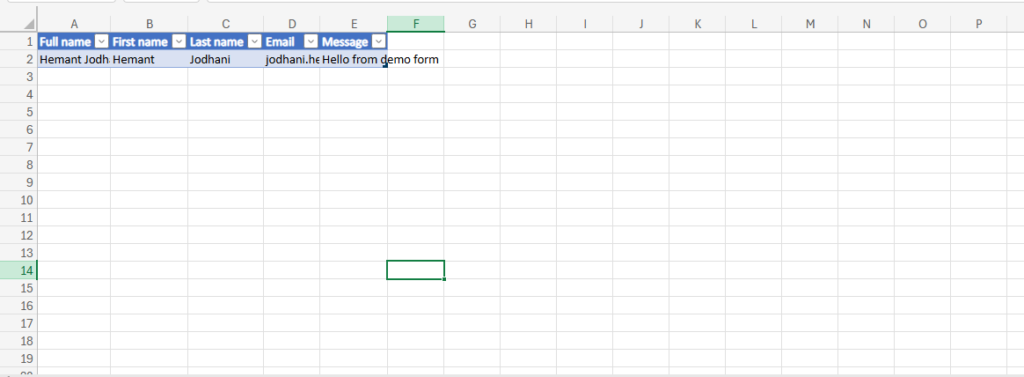
- Submit a test entry on your website.
- Open your Excel Online file.
- You should see a new row added instantly with the mapped data (Name, Email, Message, etc.) formatted exactly as defined in your mapping.


Leave a Reply